Nail the Snow Bunny Makeup Trend With This Step-by-Step Tutorial
Put down the bronzer and embrace your snow glow!
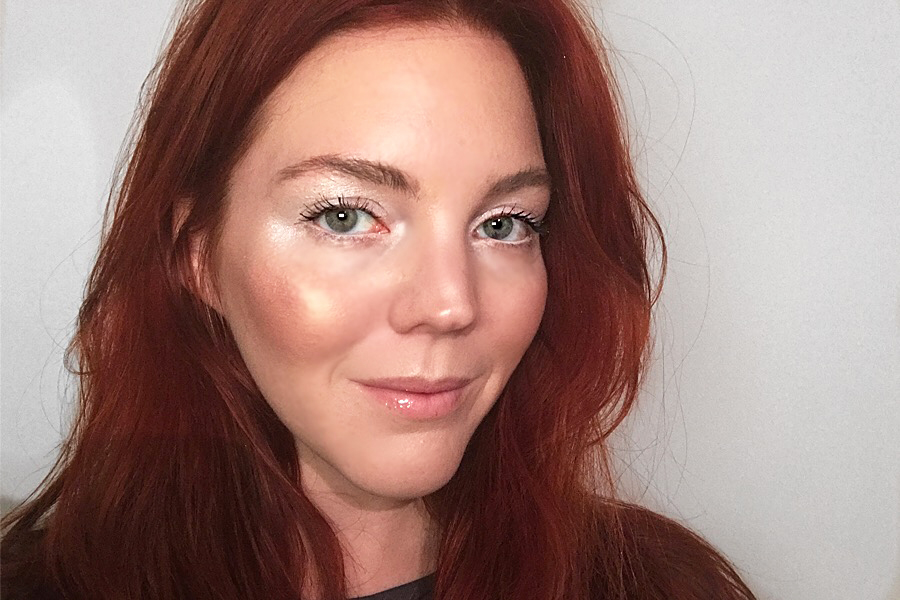
Winter is in full-force and it's time to update your makeup to match. Whether you're cozying up to a fire or hitting the slopes, I'm going to show you how to channel your inner snow bunny with this sweet, winter makeup tutorial. Your glow is going to be so on point, I promise!

Step 1: Prep and Hydrate
Start with a bare face and layer on a nice coat of facial oil as a base. The winter can be tough on your skin, especially with all of the heat indoors, so skip your usual mattifying primer and use a light facial oil, like Josie Maran's Argan Oil.

Step 2: Light Coverage Foundation
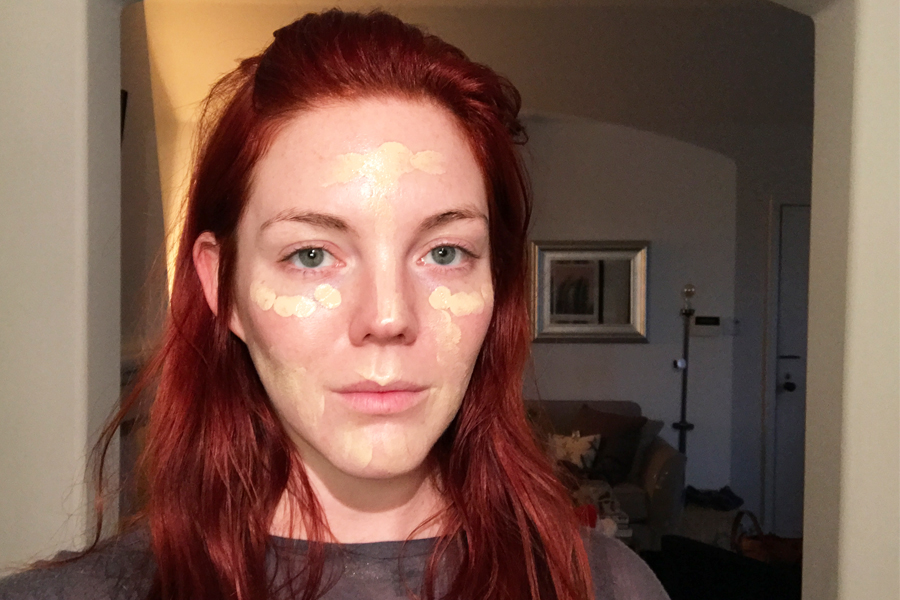
Repeating myself here, but because it's really dry in the wintertime, I skip foundation all together this time of year and opt for a light, moisturizing beauty balm. The one I'm using is by Dr. Jart and it has really pretty light-reflecting properties that make your skin shine. Notice I'm only putting it on the areas I need a little extra coverage, like my under eyes, jaw area and forehead.

Step 3: Blush and Bronze
I'm creating a sweet, snow bunny look, so what better product to use than Too Faced's Snow Bunny Luminous Bronzer, which can also act as a blush and highlighter? Start out by only using the right three colors (so everything besides the white pearl shade.) Apply this to the apples of your cheeks and up to the jaw bone using a flat blush brush. The brown bronzer will act as a light contour, while the pink blush will give you rosy cheeks.


Step 4: Highlight
Time to get that glow on! Make sure you are using a white pearlescent highlighter when creating this look. I am using the far left color from the Snow Bunny palette, and applying it to all the high points of my face (cheek bone, nose, cupid's bow, chin) with a small shadow brush. I like to use a shadow brush for precision.


Step 5: Furry Brows
For this look, I want to create full, natural looking brows so, I'm only using a brow gel. I'm using Femme Couture's brow gel in medium. Work the gel through your brows form arch-to-tail and then tail-to-arch, and then flare out your arch brows so they look a little wild.

Step 6: Frosty Eyes
Here's where the magic really happens–it's time to frost those eyes! This has a very '60s mod feel. I am using the same shadow brush from before and using it to apply a white, shimmery eyeshadow all over my lid. I'm using the color Snow from Lorac's Mega PRO 3 palette which is sadly out of stock, but you can try Revlon's Makeup Revolution Redemption palette.

Then, apply a super sparkly shadow for glitz! I'm using Colourpop x Hello Kitty shadow in Rainbow. Apply this all over the lid, in the corners of the eyes, and use it as a drop shadow.

Step 7: Line the Waterline
Take a white eyeliner and line your bottom lashes at the waterline to make your eyes pop!

Step 8: Mascara
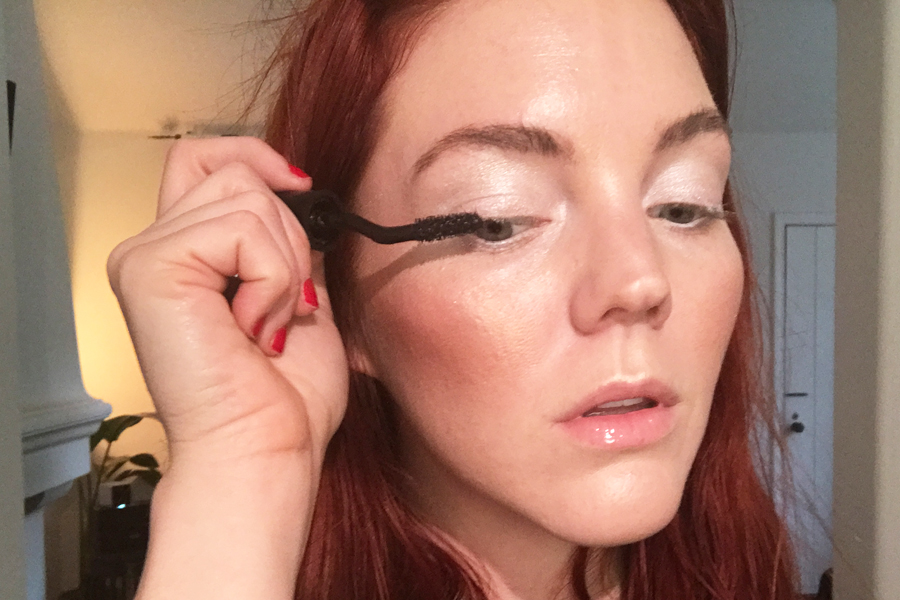
A nice thick coat of mascara looks super contrasty against your white lids.

Step 9: Pink Gloss
It wouldn't be a snow bunny look without a light pink glossy lip. I'm using Buxom's Rose Julep.

And voila, you have a super glowy snow bunny look that you can wear all winter long!

Staying in the theme of skin perfection, check out THESE awesome DIY bath bombs that will make your skin glow.