How to Make a Cute Origami Heart Out of a Dollar Bill in Just a Few Easy Steps
Finding the right Valentine's Day gift for a friend can be tough, but it doesn't have to cost a lot.
Anyone will love the personal touch of this adorable and easy-to-create origami dollar heart.
For this tutorial, all you'll need is a crisp $1 bill. You can go with an even bigger bill if you're feeling fancy!
Also read about: The Perfect Gifts for Harry Styles Fans
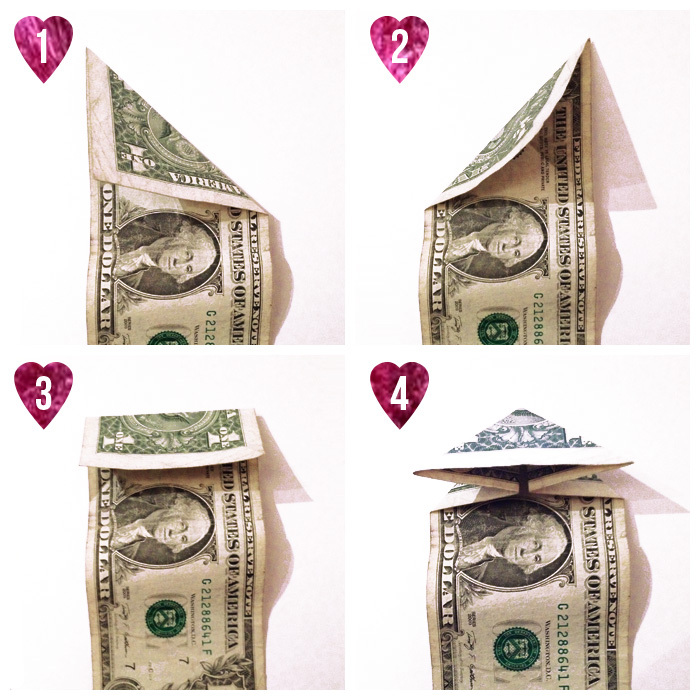
Step 1:
Take the top right corner and fold diagonally to the left.
Step 2:
Unfold and repeat the same process from the other side, folding the top left corner diagonally to the right.
Step 3:
Unfold yet again. You should notice that the creases form an X. Starting at the center of that X, fold the top of the bill downward.
Step 4:
Unfold again! Use the folds created in steps 1-3 to create a new shape, pushing the middle creases inward and collapsing the corners.
Also read about: Holiday Makeup Gift Sets From Sephora You NEED
Step 5:
You should end up with a triangular shape at the top of your bill. Take each of the bottom corners of this triangular shape and fold them both toward the top.
Step 6:
You'll see that each of these folded-up triangles has a small opening. Open one of them up and flatten to create a square shape.
Step 7:
Repeat this process on the other side.
Step 8:
Each of the small squares has open sides on the bottom and in the center. Fold each open side toward the diagonal fold along the center of the square, creating a kind of kite shape, as pictured.
Also read about: These Mindful Holiday Gifts Are All about De-Stressing and Self-Care
Step 9:
Now, take one of the shapes created in the last step and flatten it at the top.
Step 10:
Repeat this process for all four of the folds created in Step 8.
Step 11:
Now that you've completed this side, rotate the bill 180° and repeat Steps 1-10.
Step 12:
You should end up with something like the image pictured above.
Also read about: The Perfect Holiday Gifts for the Person Who Just Needs a Good Night's Sleep
Step 13:
Take one half of your heart and fold it over to meet the over half.
Step 14:
You'll now start to see the heart coming into shape. Fold back the part sticking out above the top of the heart.
Step 15:
Tuck in the little corner that sticks out at the bottom left of the heart.
Step 16:
And your heart is complete—unless you'd like to take it one step further.
Additionally, you can also fold in the side corners to give it a more rounded shape. If you'd like, a quarter will also fit perfectly in the space in the middle!
Obsessed with origami? Click HERE for some Instagram captions for your favorite DIY creations.


