How I Crocheted My First Sweater Ever With Help From We Are Knitters
After a failed attempt to learn to crochet many years ago, I had the chance to try a beginner's kit from The Woobles this summer and became positively obsessed with the art of making things out of yarn.
Of course, my initial creations were a bit limited. I quickly learned that making small amigurumi crochet plushes gave me a cute finished product without much commitment at all, but that foray into trying bigger, more practical objects, such as bags, was a much bigger challenge, taking a long time and making me lose interest quickly. I was also curious about making items I could actually wear, but was intimidated by the patterns I found online, which seemed quite complicated and involved math I really didn't want to do, and then waste hours upon hours on a project because my calculations were off.
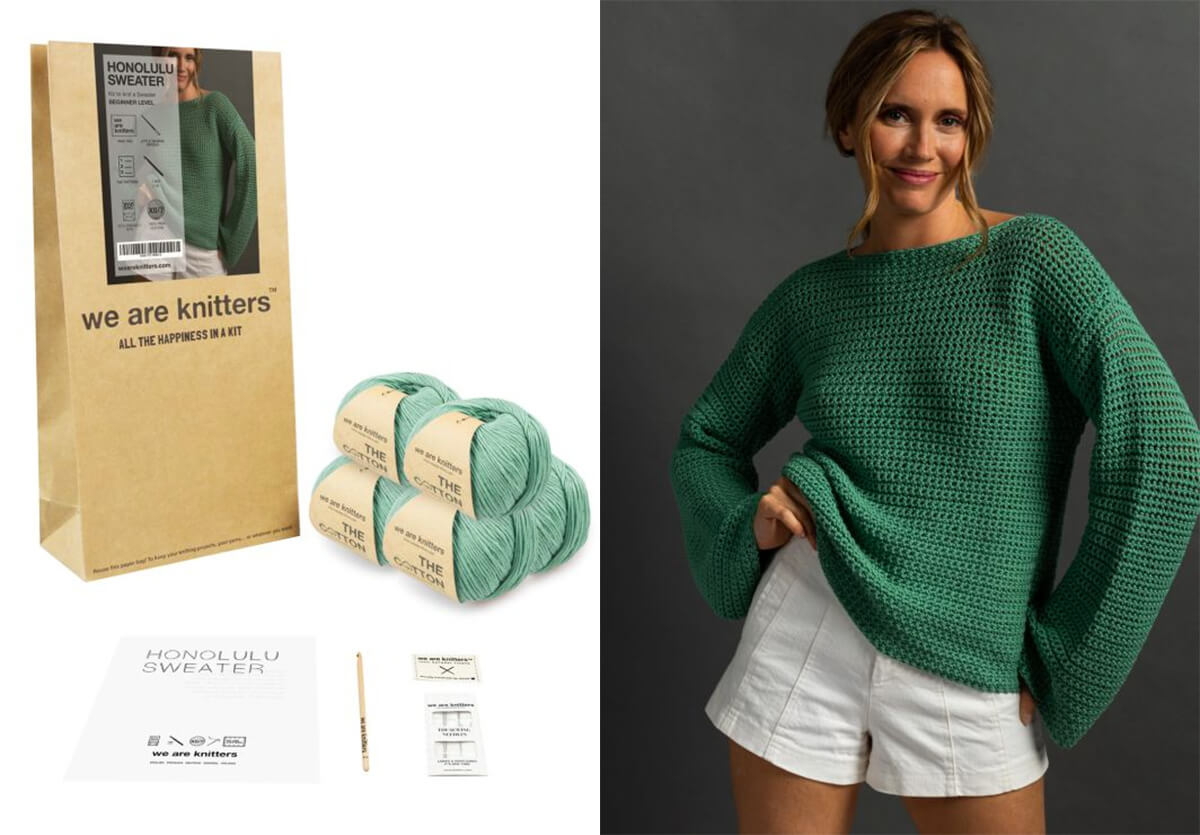
But when the team behind We Are Knitters reached out to me to ask if I'd be interested in reviewing one of their kits, it felt like the perfect opportunity to put my crochet skills to the test. I was quickly smitten by their Honolulu Sweater, and decided it'd be just the thing to attempt next. They shipped me a kit, complete with mint green yarn, and I jumped into my next big project.
The Kit
We Are Knitters' Honolulu Sweater Kit is one of their beginner-level projects, but that doesn't mean it's quick and doesn't require effort. According to their website, they estimate it takes about 50 hours to complete—so if you worked on it for two days straight, you'd almost be finished.
The kit comes with skeins of 100% Peruvian Pima cotton, available in 34 different yarn colors, and also includes a 7 mm crochet hook, as well as a pair of sewing needles and a We Are Knitters tag to proudly sew into your finished project.

(via We Are Knitters)
The kit sells for $99 for a size S or M, or $109.50 for the L and XL sizes, as they require an additional skein of yarn. Certain varieties of yarn (mostly the cute, multicolored ones) also have an additional cost, and while every order comes with a digital version of the pattern, a printed version will cost you an additional $5.90 on top of the kit.

(via We Are Knitters)
Also read about: These Creative Art Sets for Teens Are the Perfect Way to Get Crafty
The Experience
I was so excited when my We Are Knitters package arrived, complete with several skeins of super-soft yarn in a gorgeous mint green color, and a wooden 7 mm hook, which was new for me in terms of size as well as material.

Before I got started, of course, I needed to see what I'd actually be doing, so I opened up the physical paper pattern guide and started reading. Over the course of 13 pages, it included information on the video section of the We Are Knitters website, an index, a size guide, schematics and measurements for the back, front and sleeves, plus info on tension, and writeups on the different techniques needed for this project. The thing that intrigued me most was the schematic, which showed me the entire project consisted of four rectangles—two equally sized ones for the front and back, and another two equally sized rectangles for the sleeves. Could it really be that simple? Even further, the only stitch used in the entire project was the single crochet stitch, the most basic element in all of crochet. of course, this project would have me repeat that basic element more than 14,000 times, so I really had my work ahead of me.
Before I got started, I followed a tip in the pattern book and made a tension sample. This is essentially a square used to determine whether you're crocheting too tightly for the pattern at hand. During this process, I learned a couple of things.
Firstly, as someone used to making plushes, which require tight stitches so that the stuffing doesn't fall out, I found it unusual to work with a thicker hook while using a lighter yarn. The bigger gaps in between the stitches are intentional, making for that classic crocheted look, but I had to resist the urge to pull them in tight every time.
Secondly, the hook was wooden, with a sharper flat edge than the metal hooks I was used to, so it took a little practice to get the hang of it. I found that anytime I mindlessly yarned over, I could grab the fibers of the yarn incorrectly, splitting them rather than pulling the whole stand in one seamless tug. I had to keep an eye on what I was doing not to repeat this mistake. Lucky for me, the yarn was very smooth and high-quality, coming in small skeins so it doesn't tangle and make it tough to work with.
And after making the recommended 11 stitches across and crocheting up 15 rows, I measured with a measuring tape to find it wasn't even close to the desired 10 x 10-centimeter square I was looking for. I unraveled the whole thing (the silky yarn, thankfully, made this a breeze) and started again. This time around, with my mind on keeping things loose, I was basically there, and decided to get started on the sweater at large.
I had to appreciate the simplicity of the whole thing. I just had to start a chain the width of the front of the sweater, turn the whole thing around and single crochet across, and then repeat that process over, and over, and over again. There was a space for notes at the back of the pattern guide, but I always feel weird writing in nice pamphlets, so I used a journal to count my rows, making tally marks after I finished each one. At first, the huge number of rows required felt intimidating, but slowly, yet surely, I got closer and closer with each passing minute. While I had to take my time, at first, with a different kind of hook, practice made perfect, and with more deliberate motions, I was soon making more consistent stitches—and preventing myself from additional snags and slowdowns.
I didn't keep count of the hours (who has the time?) but after several evenings of nightly crocheting, I was finally done with the front panel of the sweater. I brought out the tape measurer again to see if it was the expected size, and though it was a little smaller than I'd hoped (those occasional tight stitches can be a real hassle), I decided it was good enough, especially for my first attempt, and that it was time to move on. I tied a knot to secure it, and left about 20 inches of yarn for sewing in when the time came.
It took a few weeks and a lot of repetition, but eventually, I had the four pieces that were to become my sweater. All of them had come out a bit smaller than I'd wanted, with the sleeves (which I did last) being the closest to the desired size. Using the included sewing needle, I carefully secured the pieces together according to the directions before weaving in the ends. This was also pretty new to me, but I soon got the hang of it, and without too much struggle, I was done with my very first sweater!

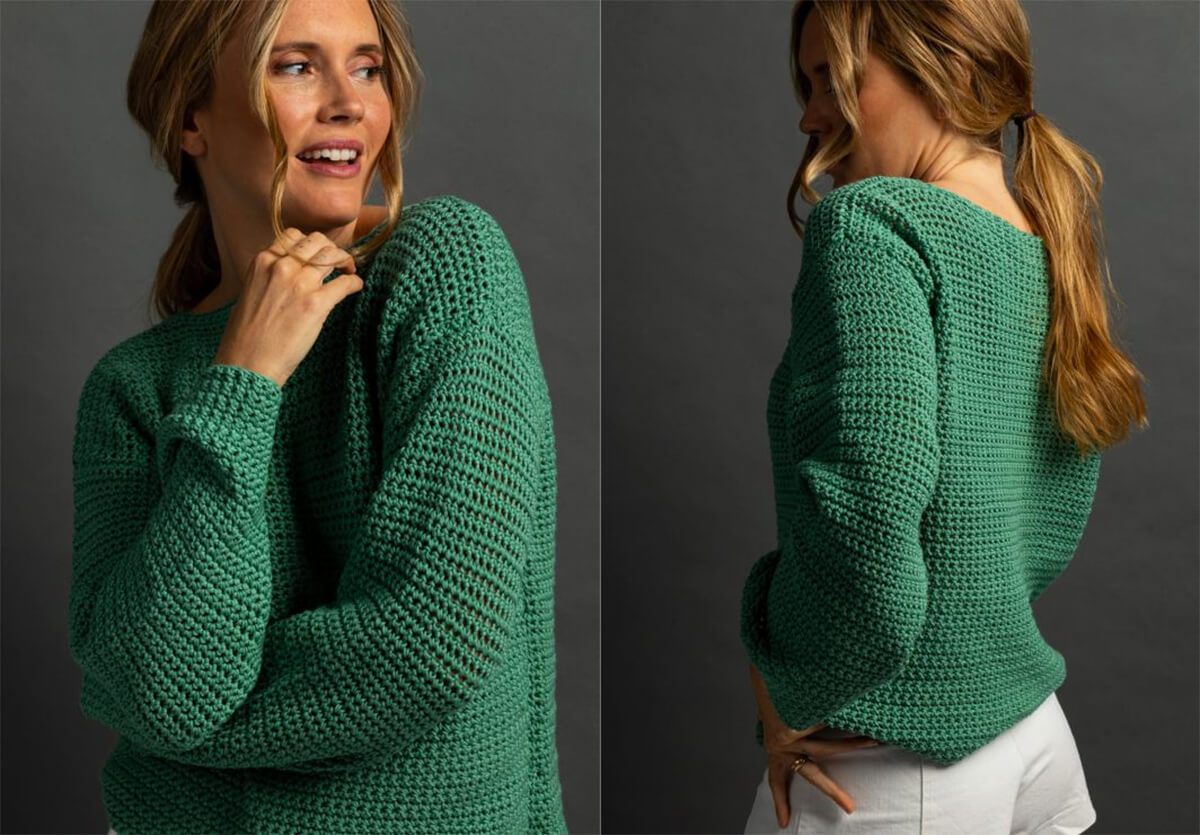
Given that the sweater was, in essence, four rectangles, I was shocked by how cute it turned out. It was a bit snug, but still wearable, and that was the most important thing. After all those hours, I was pretty proud of what I'd done.
Also read about: How Ashlee Elle Turned Her Passion for Crochet Into The Dream Crochet Shoppe and a Brand New Book
Bottom Line
Crocheting my first sweater with We Are Knitters took a lot of time and energy, but the end result was an incredible, wearable garment I'll always cherish. I appreciated that it showed me what I was capable of, and over the process, I learned a lot about how much tension can affect your crochet projects while doing a lot to improve my technique.
While I'm not raring to jump into another sweater anytime soon, I do love knowing it's something I can do, and I'll definitely be using the pattern again sometime in the future. Maybe I'll even invest in one of We Are Knitters' knitting kits and see if that's another hobby that might take over my life!
Curious about my plush crochet experience? Click HERE to learn more about The Woobles.